


Sebastian Pontus
Smart Home with the Photon Robot #3 – an infrared sensor
Class goal:
- the meaning of the term smart home and its principle of operation
- IR sensor working principle
- how to use the “Repeat” and “If… else” statement when programming
- how to make use of an IR sensor in a domestic environment
- how to use the screen sharing feature in Microsoft Teams platform and remotely control another computer (server-client communication)
Teaching methods:
- explanatory talk
- brainstorming
- simulation
Type of exercise:
- group
- individual
Required items:
- Interactive exercises on the Genial.ly web app: http://bit.ly/Smart_Home_infrared_sensor
- laptops (PCs) with Microsoft Teams application installed
- a smartphone or tablet with a camera to be connected via the MS Teams platform
- two (x2) independent MS Teams accounts (an account on a teacher’s laptop (server) and an account on a smartphone/tablet – to stream live video from the camera)
- cardboard house or a model house for the Photon Robo
- a spare remote control (e.g., for TV), working and with batteries
Attachments:
Lesson scenario:
THIS LESSON SCENARIO IS A CONTINUATION OF OUR “SMART HOME WITH THE PHOTON ROBOT” SERIES. BEFORE COMMENCING THIS LESSON, WE RECOMMEND TO CONDUCT THE PREVIOUS CLASSES FROM THE SERIES:
- How to control lights at home remotely
- Remote audio monitoring vs. burglars
LESSON PREPARATION:
A detailed description of how to prepare for the lesson is available in scenario "How to control lights at home remotely".
Lesson scenario:
1. Introduction
- Please greet the students and check the connection’s quality, i.e., video, microphone, speaker. Remind all participants of the basic rules of online classes.
- Inform students that they can use the “raise hand” feature in MS Teams application at all times.
- Please mention that there is an additional account/tool in your group (a smartphone/tablet). From this account, students will only receive a live video stream.
2. Warm-up
- Send students a link to a virtual warm up exercise. Their task is to decipher the topic of this lesson (i.e., to put all the letters in the correct order).
Link: http://bit.ly/Smart_Home_infrared_sensor (Slide 2) - To solve this puzzle, students need to prove their teamwork skills. One part of the team has to keep an eye on the code, the other on the encrypted password. Efficient cooperation will allow them to complete this task
The topic: Infrared sensor
3. Smart home – sensors
- With materials (or notes) from the previous class at hand, ask students to review the smart home concept. You can briefly review the topics and tasks covered in the earlier classes.
- As a warm up activity, ask students to research the Internet on how a remote control works (e.g., TV). They should put a few links to such information on an interactive whiteboard (e.g., Explain Everything https://whiteboard.explaineverything.com/ a sample key phrase for the research: “How does a TV remote control work”)
- After that, divide students into three (3) groups. Assign one room/space in a virtual home (living room, kitchen, garage/driveway) to each team. Ask each group to switch to the Genial.ly web app and their assigned spaces (slides 4, 5, 6). Using a pen (top right corner), they should mark items they would like to control at home.
- Ask for examples of how they would improve the comfort of living. Put their ideas on the shared interactive whiteboard.
- Discuss their propositions. Ask questions about their practicality and usefulness. Do they think that some of the proposed solutions might be just unnecessary, expensive gadgets?
- Students may choose to work in groups in separate “rooms” in MS Teams or individually on their own computers.
- Ask students to name a few benefits of controlling devices with IR remote controls (you need a separate remote for each device, remotes get lost, etc.).
- Explain the latest smart technology. Make it clear that nowadays, smart home users may control many devices with just one application.
4. Experiment: Is infrared light visible?
- Ask students if they know how to see infrared light (i.e., check if a remote control works).
- You can easily show them “a visible IR light” by pressing the buttons on any remote control while directing it at your webcam.
- In their free time, students might want to perform the following experiment: https://www.carolina.com/knowledge/2020/02/20/make-the-invisible-visible...
5. Intelligent home components – infrared sensor as a distance sensor
- At this point, explain yet another use of the infrared light – emitting the IR beam and calculating the angle of reflection to measure distance.
- Ask students to discuss the possible use of an IR distance sensor at home.
- Suppose you know the operating principle of IR distance sensor. In that case, it is worth explaining it to the students and possibly compare it to an ultrasonic sensor.
- If not, it will suffice to explain that infrared light emitted from an IR diode reflects from objects, and only a portion of it returns to the receiver. If the object is close, the reflected light will be stronger than if reflected from objects further away. The amount of reflected IR light allows the controller to calculate the distance from an obstacle.
- Ask students to come up with several examples of sensor implementation: open door/window alarm, safe doors, etc.
6. Smart Home in practice – an open door sensor
- First, ask students how information about open doors/windows could be helpful.
- For the sake of discussion, make sure students mention the following security issues:
- opening the door indicates an attempt to enter the house
- leaving an open garage/window in your absence may lead to burglary
- leaving open doors in a freezer can cause the food to thaw and go off.
7. Smart Home in practice – open doors indication (Photon Blocks)
- At this point, launch the Photon Magic Bridge application and connect to the Photon robot. Then run the Photon Blocks interface inside the application.
- Switch over to the MS Teams and share your screen (Photon Magic Bridge runs in the background) with the Photon Blocks interface.
- Place the robot near the door, e.g., 15cm from a closed door.
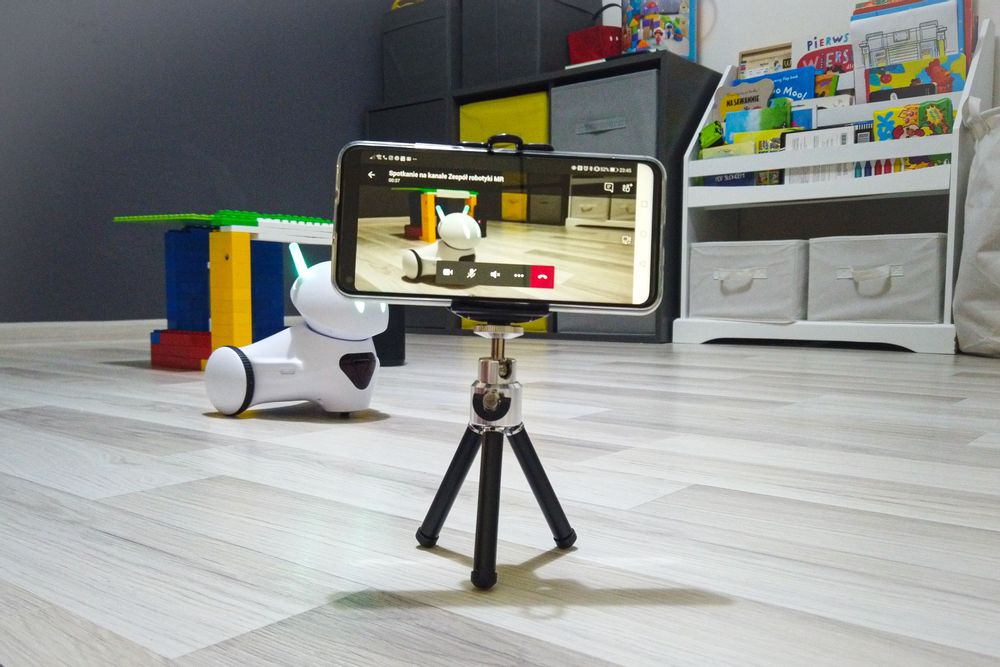
- Remind students to observe the robot’s reactions on the two MS Teams accounts. One group monitors the robot’s surroundings through the camera (it should face the robot AND show the door).
- Together with your students, analyze blocks on the presentation slide (Genial.ly – Slide 7) and then ask them to prepare a relevant program.
- Next, give control over your shared screen to one student who should remotely write the program in the Photon Blocks application.
- After a joint analysis of the program, encourage students to give examples of possible changes to the program (the robot: add sound, lights, movement; the screen: change a scene, add text, etc.).
- Once done, relate to the previous class and point out a significant fact: we know about open doors only from the camera image. Therefore, it seems necessary to provide some feedback in the application, as in the previous class, using the Scratch interface features.
8. Smart Home in practice – open doors indication (Scratch)
- Describe the exercise’s goal, i.e., programming the smart home’s next element: open door detection using the IR sensor.
- We suggest using a blackboard/whiteboard to draw a simple diagram explaining the operating principle.
- If the door is closed, the robot on the screen (the sprite) lights up green.
- If the door is open, the robot’s ears turn red, the Scratch scene changes (the red costume), plus a relevant message pops up on the screen to indicate the open door (let’s say for 2 seconds).
- Before students move on to the next slide in the Genial.ly web app: ask the students to recall commands responsible for the application’s feedback messages, i.e., which commands will change the Scratch scene on the screen. See Commands from the “Appearance” tab.
- Using the next slide in the Genial.ly web app (Slide 8), your students should create a program responsible for an automatic open/close door notification individually. You might want to relate to the program from an earlier class and remind us where the robot alarmed us when it heard a noise. Here, the robot only passes on the information – the door could open only for a while (when we answer the door and talk to someone). Therefore, students need to use the “If… else” instruction and not the “Wait” instruction.
9. Executing the final program. The final open door sensing test.
- Run the Scratch interface on the computer connected to the Photon Robot and share your screen with the students. Next, give control over your shared screen to one selected student who should remotely write the program for the Photon robot using the Photon Blocks interface. The same student executes the program.
- Remind students to observe the robot’s reactions on the two MS Teams accounts. One group monitors the robot’s surroundings through the camera (showing the robot AND the door). The second group attentively monitors the program execution and the Scratch scene (robot’s reaction).
- Then, as you are near the robot and can control its environment, change the environmental variable, i.e., open and close the door, to allow students to check and assess the created program.
10. The Lesson Summary
- Initiate a lesson summary. Ask the students to name basic differences between programming in Photon Blocks and Photon Scratch.
- Your students should notice that the Scratch interface allows giving feedback through the application. It means users can receive more than visual feedback from the robot via the connected camera. The Scratch interface allows receiving information about the open door with graphic feedback through the application (change of scene) even if the camera is turned off or inoperable.
- If you plan to conduct one more class from the Smart Home with the Photon robot series, you may want to announce it.
- Otherwise, it might be a good idea to summarize classes conducted so far, focusing on the possibilities, pros, and cons of smart home technology.
Related resources
- Smart Home with Photon robot #1 - How to control lights at home remotely: https://portal.photon.education/en/scenario/79-smart-home-with-photon-robot-how-to-control-lights-at-home-remotely-remote-classes-using-microsoft-teams
- Smart Home with the Photon Robot #2 – remote audio monitoring vs. burglars: https://portal.photon.education/en/scenario/122-smart-home-with-the-photon-robot-remote-audio-monitoring-vs-burglars